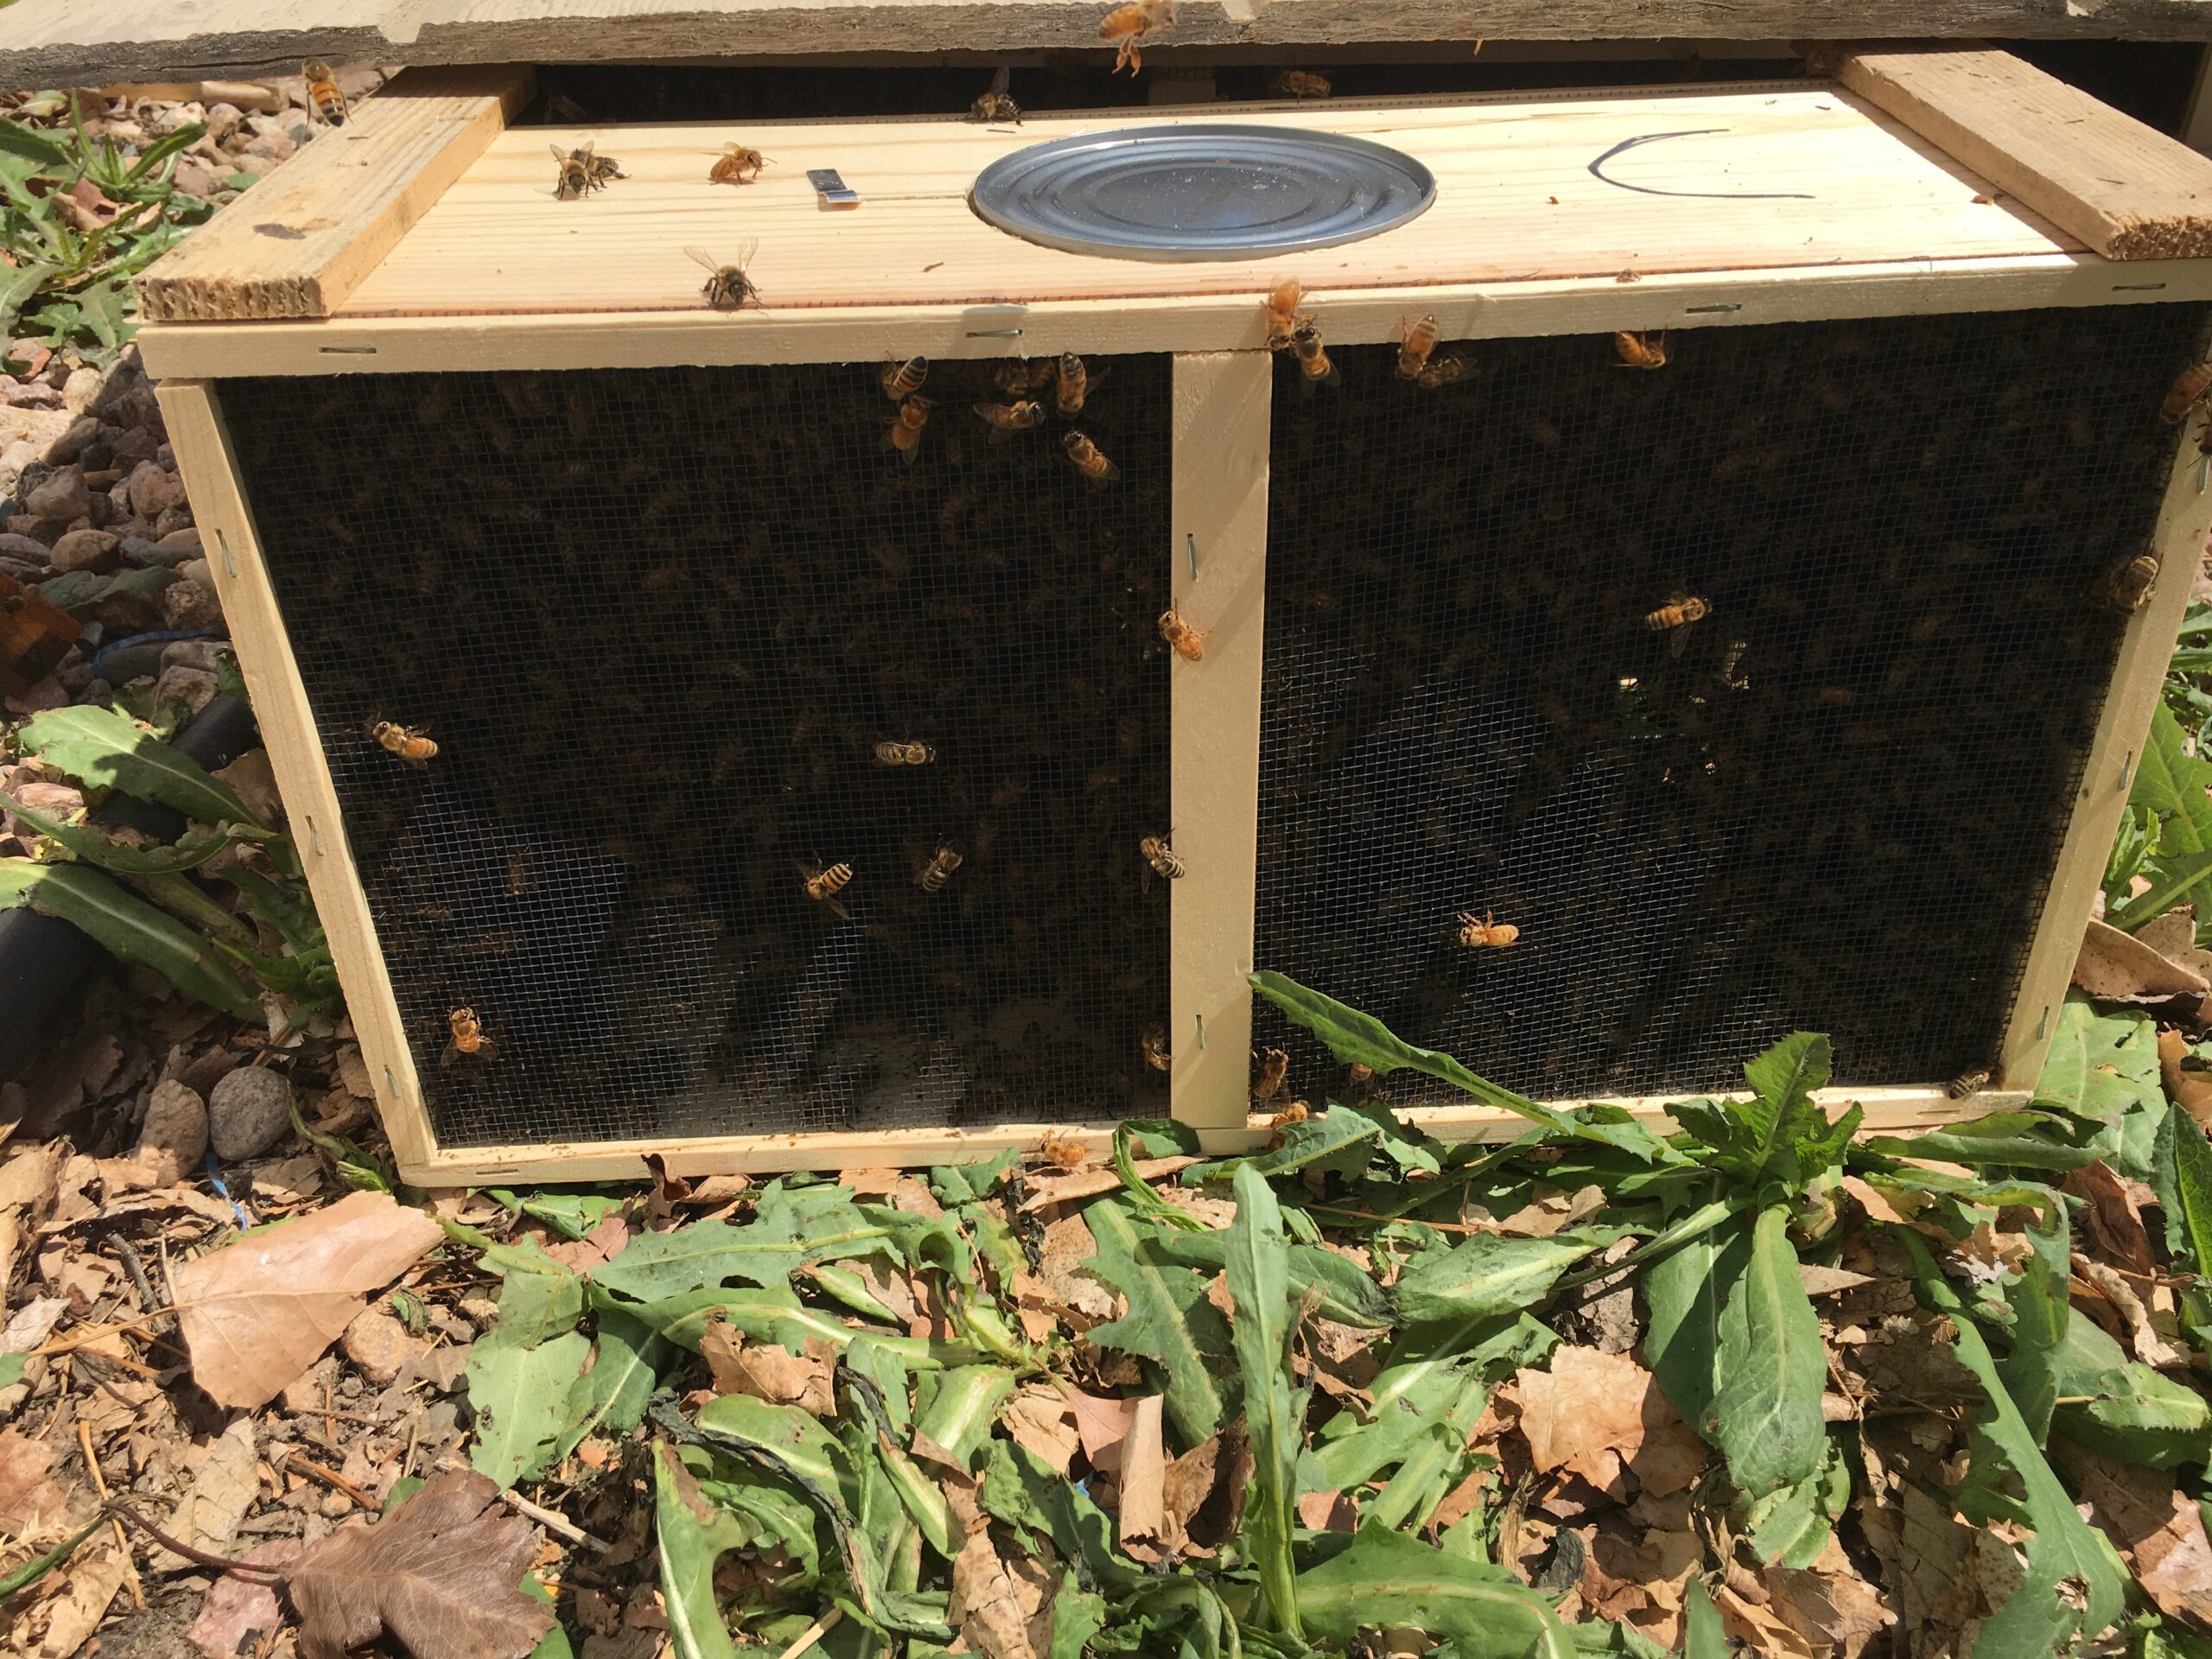
So, you have your first package of bees but aren’t sure how to install them into your hive? No problem! Just follow these easy steps! If your package looks like the picture, then you have a wooden box with a can in the middle and bees inside. Before you start, remove 4 to 5 frames from the middle of your hive and spray them down with sugar water, and set them aside. Now you’re ready to begin. Along the top side of the can, you will see a cut in the wood with a metal strap piece coming out. That strap is connected to your queen. The can is just food for the bees while they travel. Take your hive tool and stick it under the edge of the can and pry it up. Once you get a side up, use your hands to remove the can from the package. Don’t worry, your bees won’t fly away! Bend the strap straight and pull the queen cage out, following the cut in the wood. There will probably be a clump of bees on there, but that’s fine…just take the strip and bend it around the top of the frame so the queen hangs do on the foundation. Make sure the screen side is facing the open space. You don’t want to smother your queen! Now pick up your package and dump the bees into the box where you removed the frames. Gently wiggle the frames you took out back into the hive and close the hive. Check back in 3 days to make sure your queen is out of her cage. If you had a cork in the cage, carefully remove it and place it back in the hive. Check back again in 3 days to make sure she is out!
